Cloudflare
Connect your Cloudflare domain to WaxForward
Onboarding
Connect your Cloudflare domain to WaxForward in five simple steps.
1. Add your domain in WaxForward
- In your WaxForward dashboard, click “Add Domain”.
- Enter:
- A full domain, like
example.com - Or a subdomain, like
mail.example.com
- A full domain, like
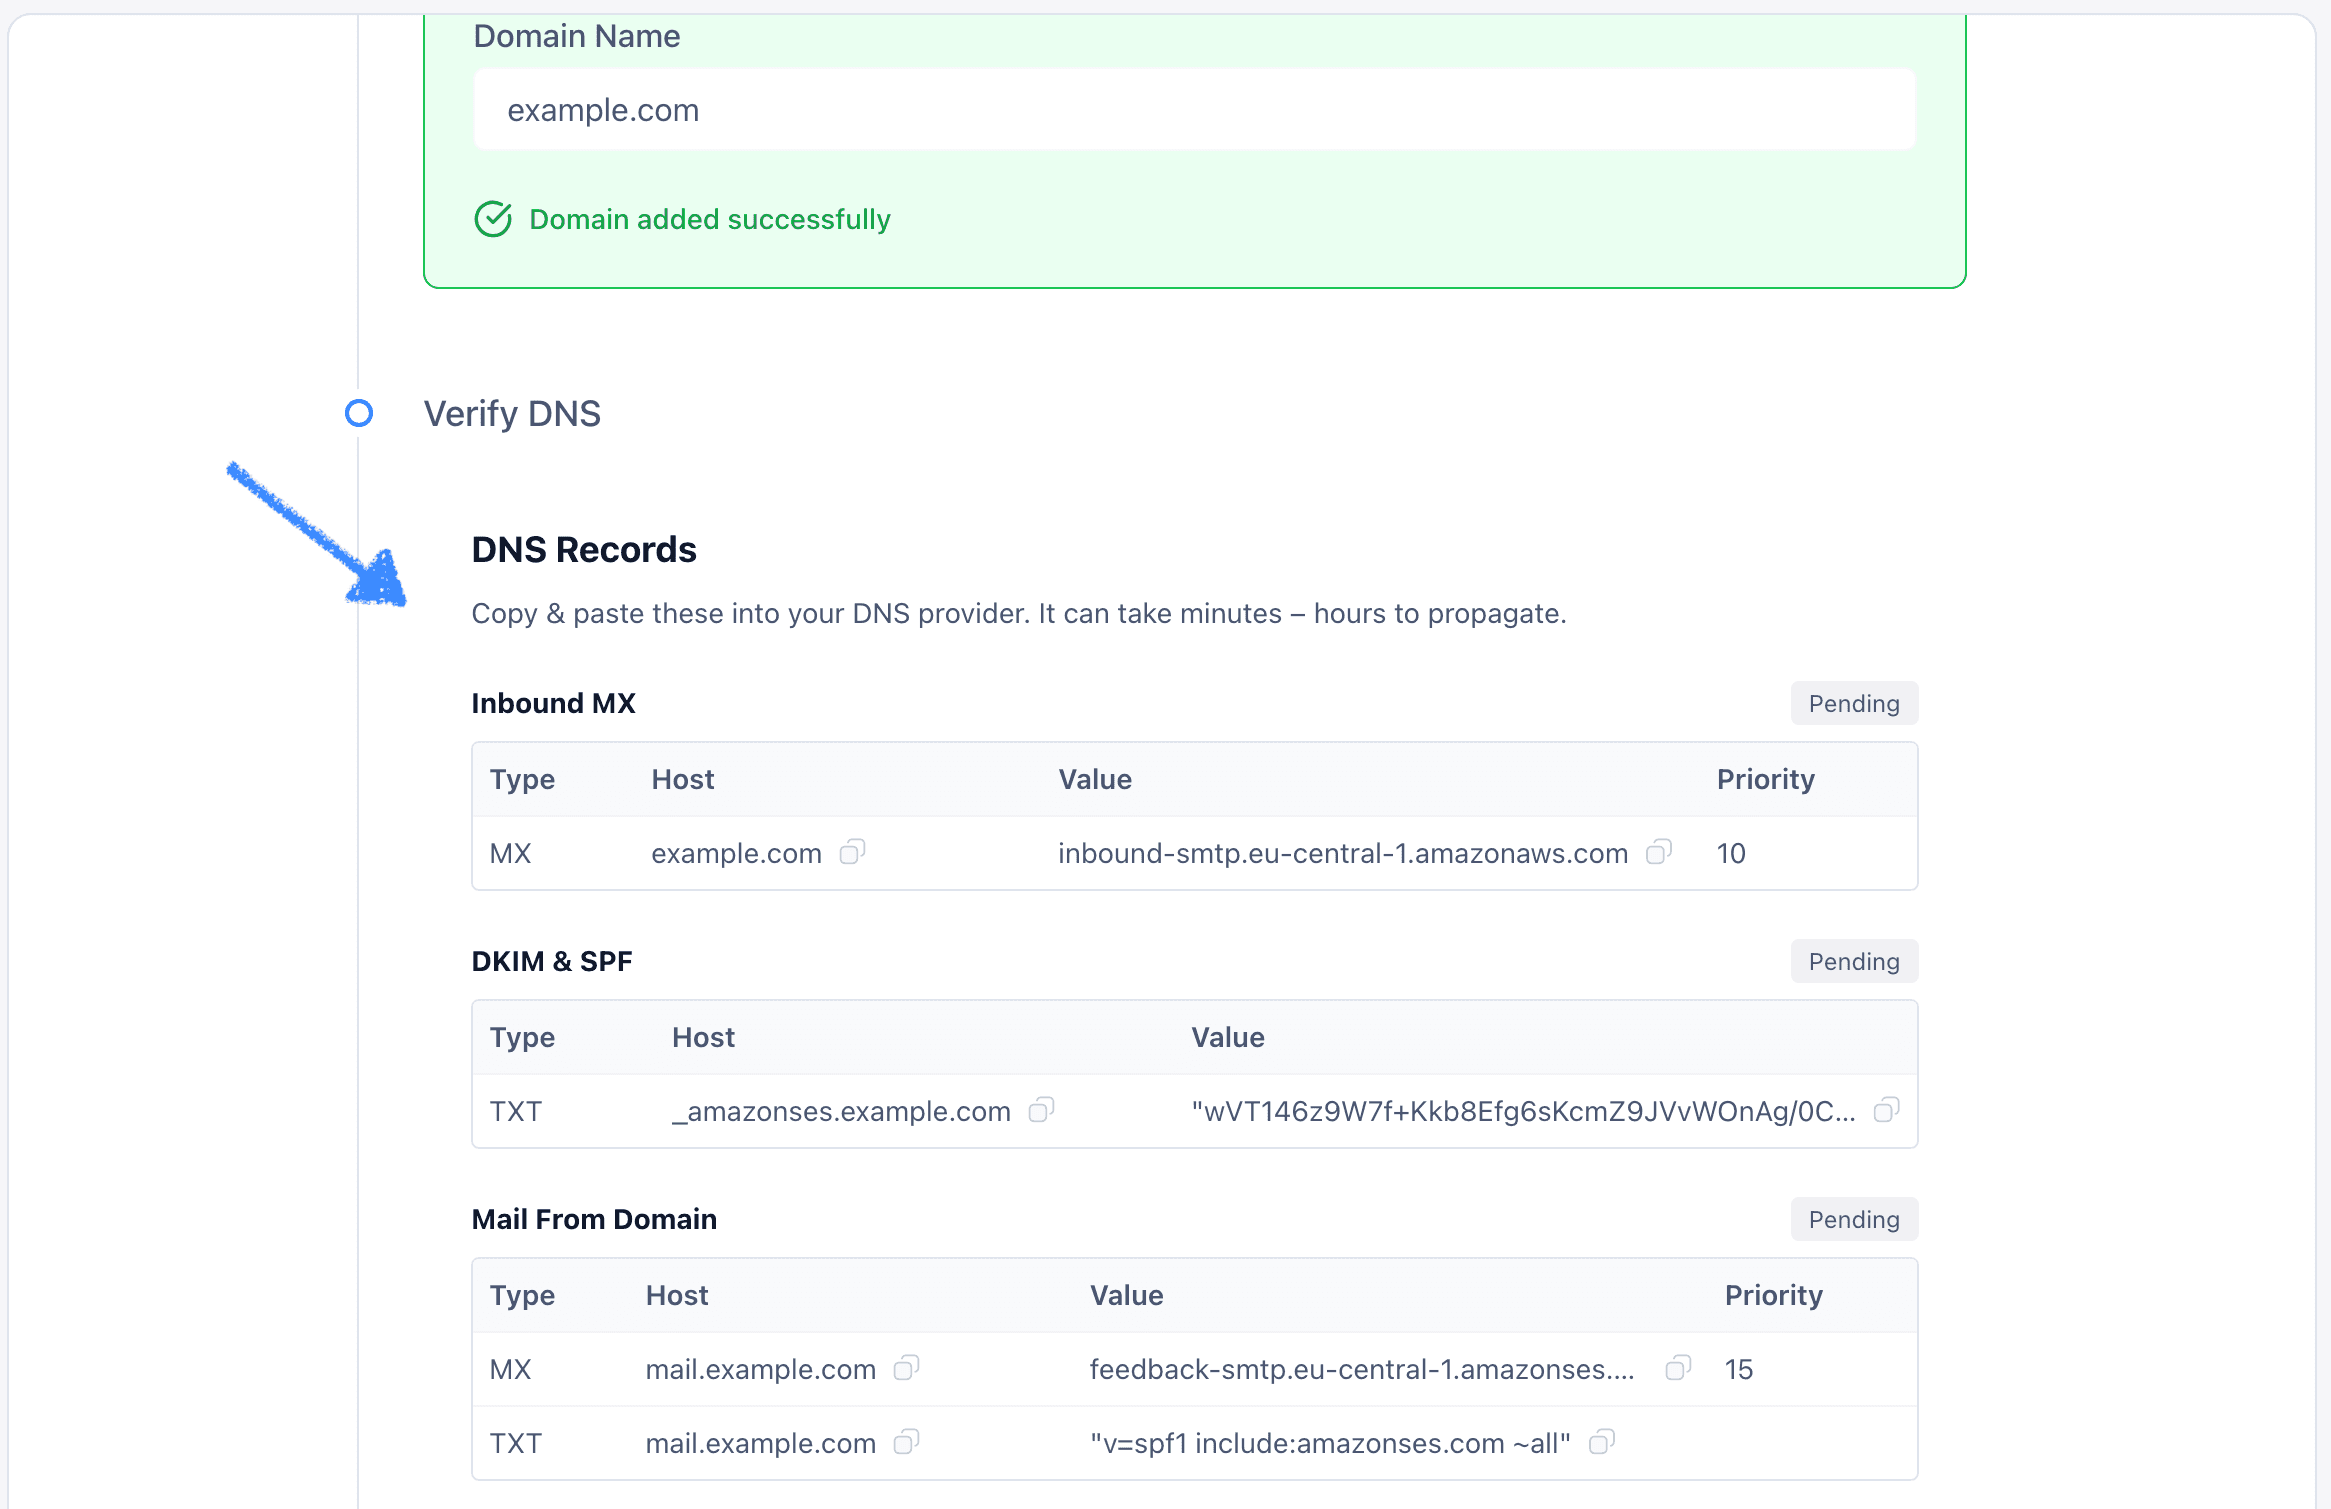
- Once added, WaxForward will generate the DNS records you need:
- MX – for receiving emails
- TXT – for domain verification and SPF
- TXT –for DKIM authentication
- MAIL FROM – for bounce handling
2. Open Cloudflare DNS settings
- Log in at cloudflare.com.
- From the Dashboard, click the domain you want to connect.
- Go to the DNS tab.
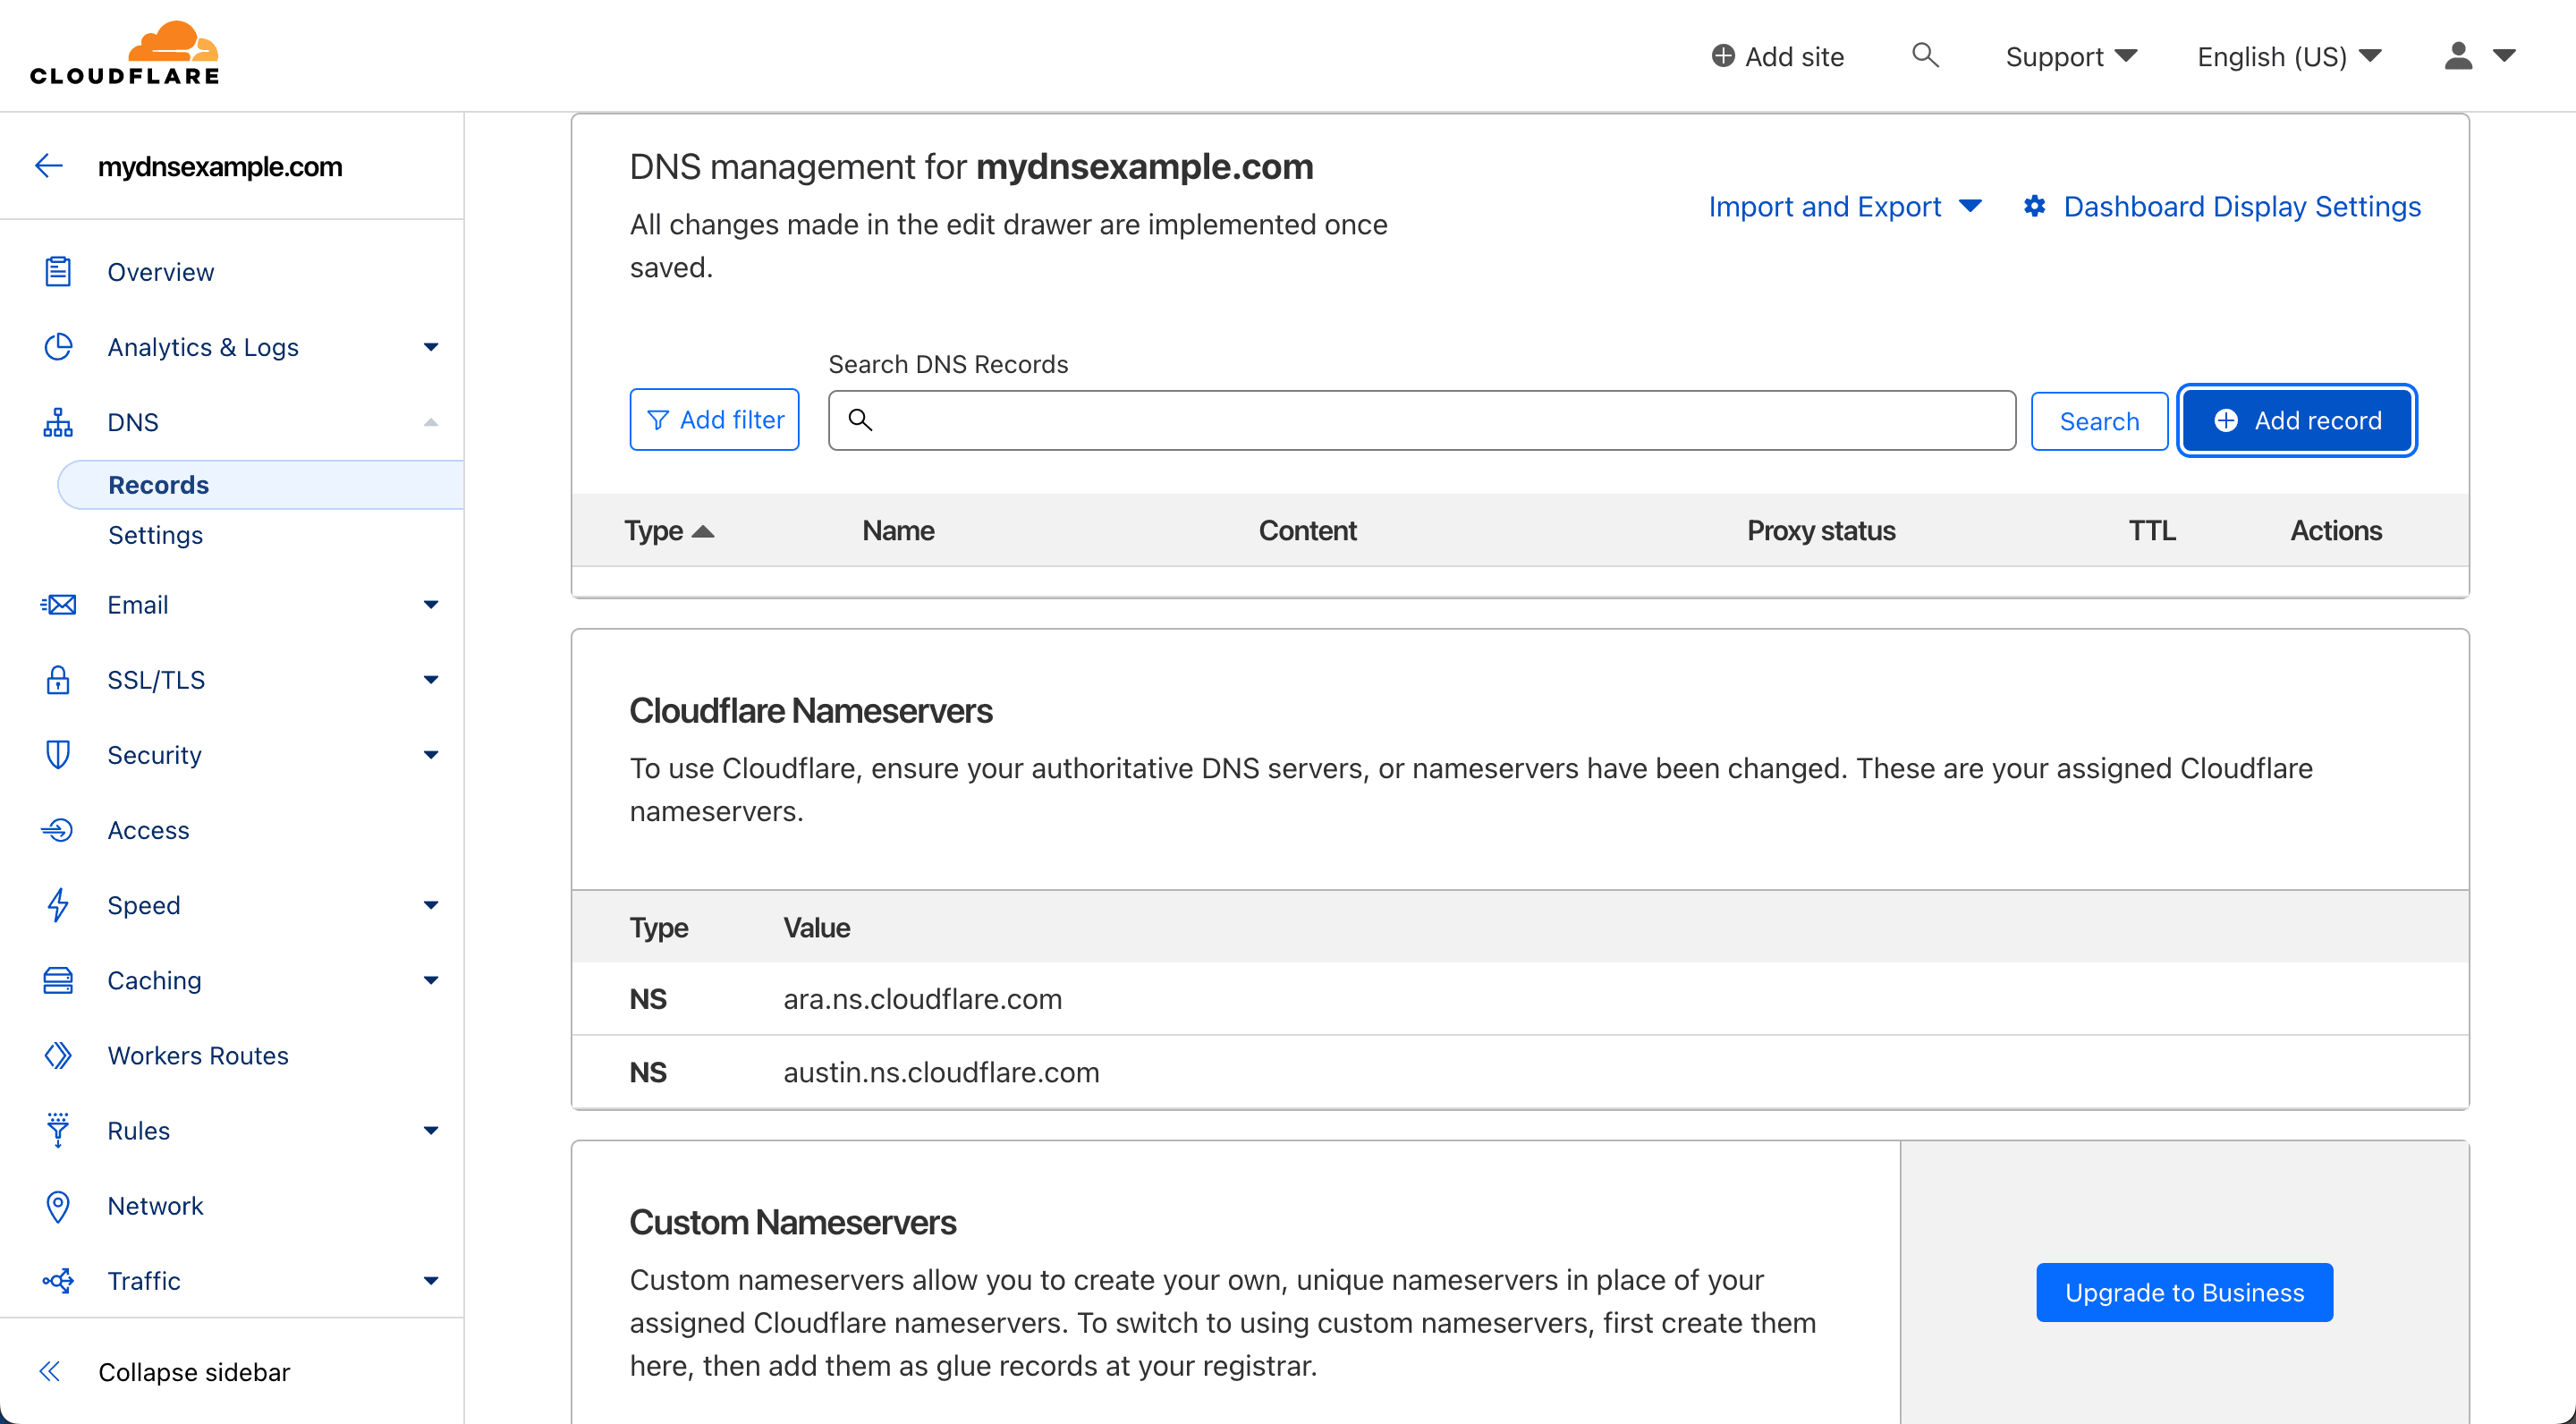
3. Add the required DNS records
Copy each record from WaxForward exactly as shown. Example:
| Type | Name | Value | Priority |
|---|---|---|---|
| MX | @ or mail | inbound-smtp.eu-central-1.amazonaws.com | 10 |
| TXT | _amazonses.mail | "your-verification-token" | — |
| TXT | xxx._domainkey.mail | xxx.dkim.amazonses.com | — |
| TXT | mail | "v=spf1 include:amazonses.com ~all" | — |
| MX | mail | feedback-smtp.eu-central-1.amazonses.com | 15 |
Name format
Use only the prefix (e.g. @, mail, _amazonses).
Do not include the full domain (e.g. mail.example.com).
4. Verify DNS records in WaxForward
- Return to your WaxForward dashboard.
- Click “I’ve added the records”.
- WaxForward will check each record and display its status.

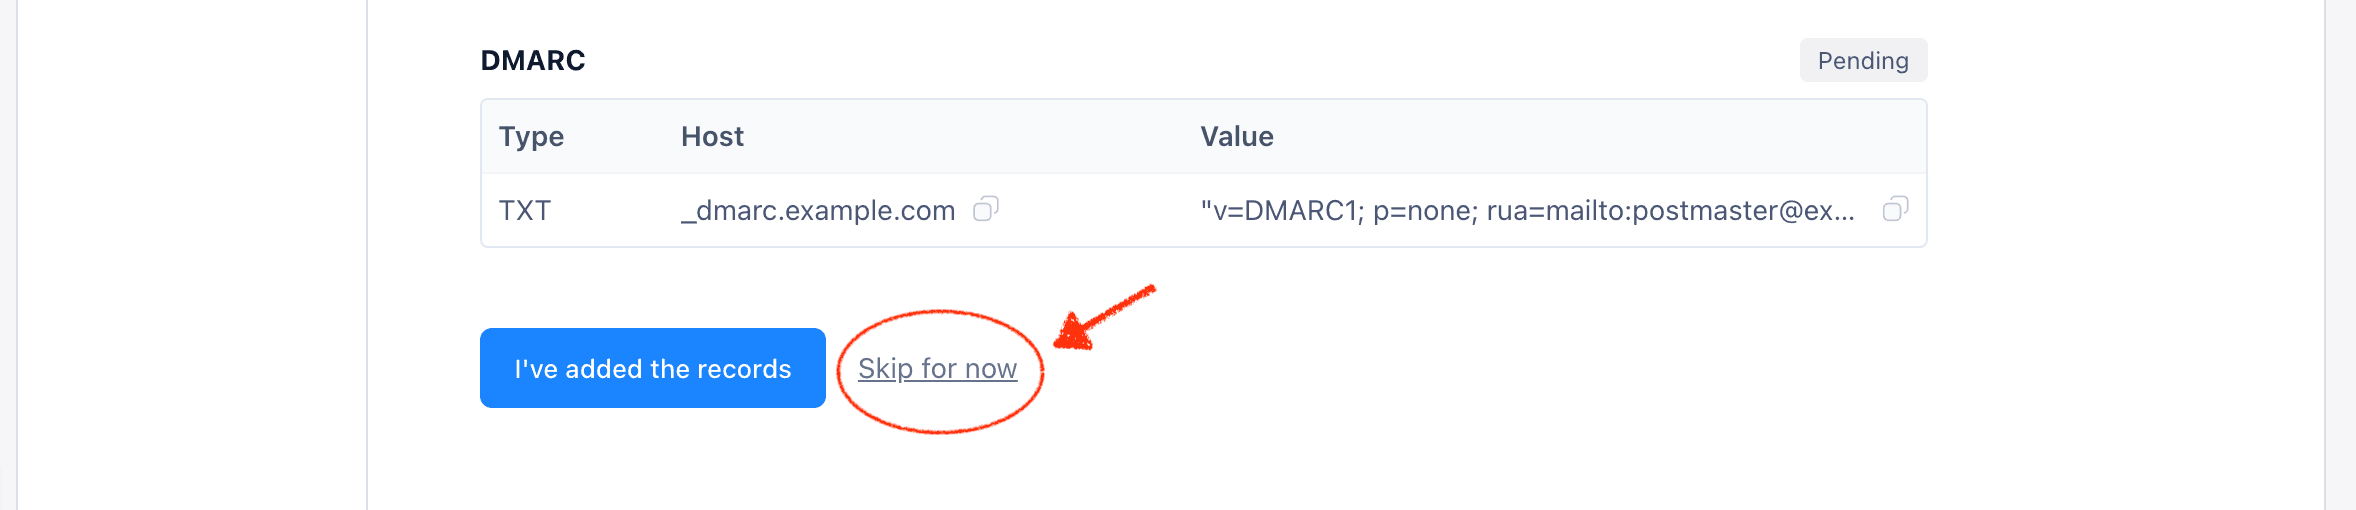
If any records remain Pending:
- Wait a few minutes, then click Refresh.
- If they’re correctly configured but still pending, you can skip them — WaxForward will continue verifying in the background.
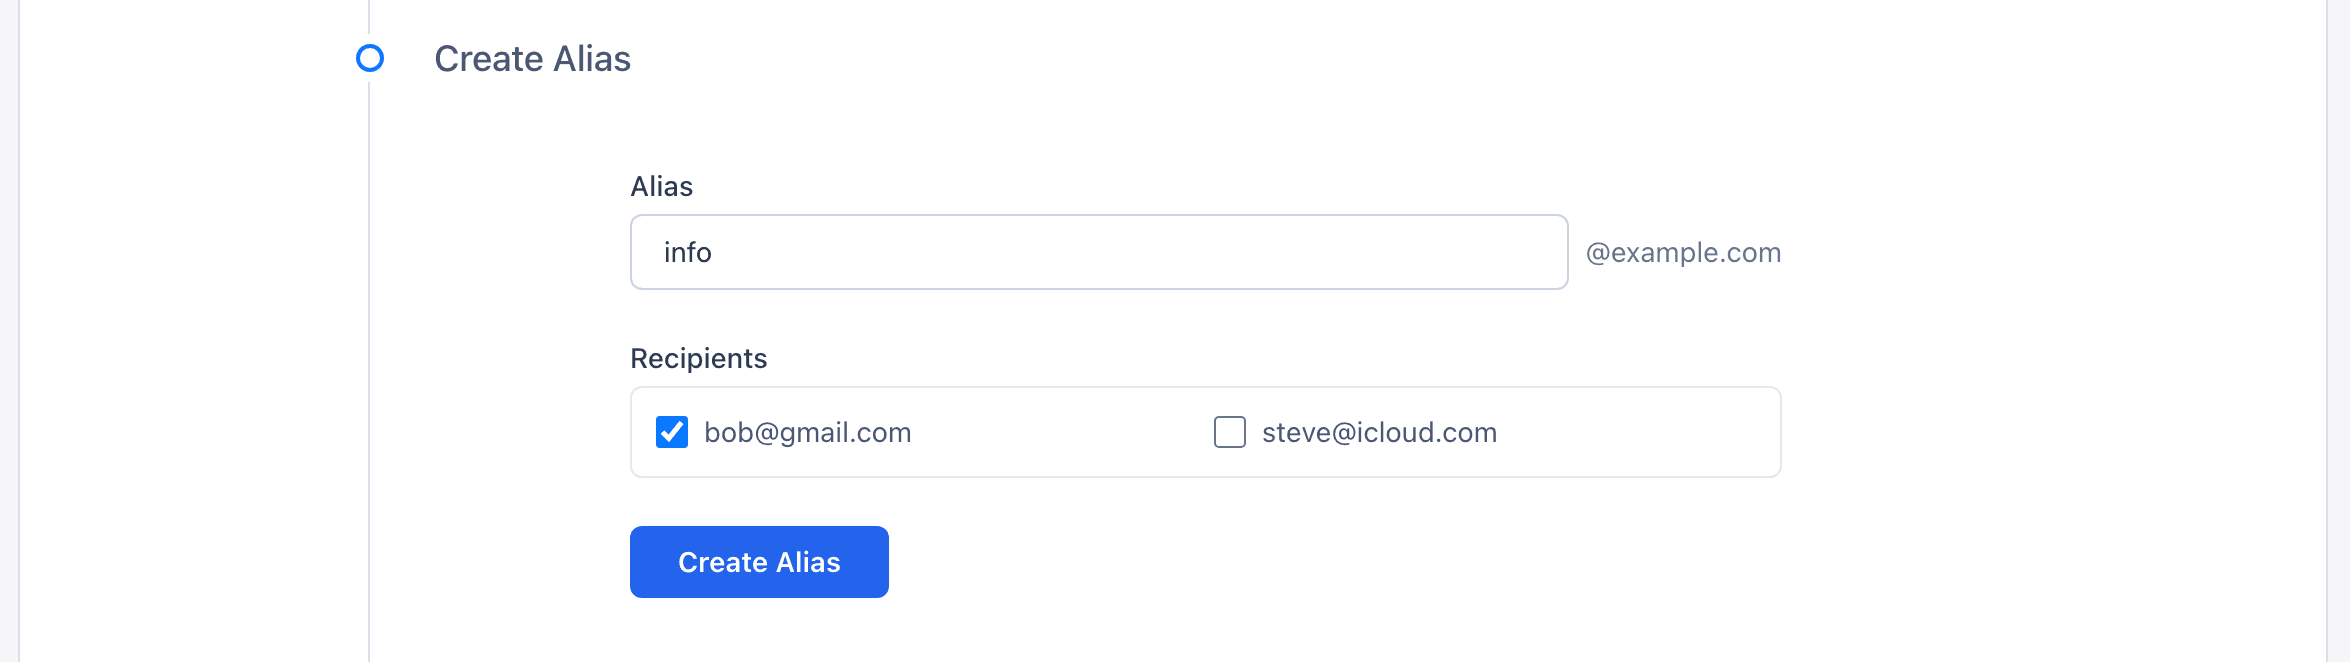
5. Finish setup
Once all records show Success, your domain will be Active.
You can now:
- Create aliases like
contact@yourdomain.com - Send and receive emails via WaxForward